Please note : This help page is not for the latest version of Enterprise Architect. The latest help can be found here.
Select <Item> Dialog
The Select <Item> dialog is a multi-purpose browser and search tool for locating model items such as Classifier elements, properties, attributes and behaviors.
The <Item> in the dialog title changes to represent the type of item the original operation is working on. The dialog is called in a range of operations; for example, setting:
- The base type or classifier for an Object, Swimlane or Lifeline
- Classifiers for the return types for operations
- Classifiers for generalization sets
- The associated behavior for a behavior call
- The type and return type for operation parameters
- Activities for State transitions
- Activities from which to generate Use Case Scenarios
- Pattern element defaults
- The values of Tagged Values.
To select a required item, follow the steps below:
- During an operation, when it is necessary to locate an element or feature, you click on the [ ... ] (browse) button. The Select <Item> dialog displays.
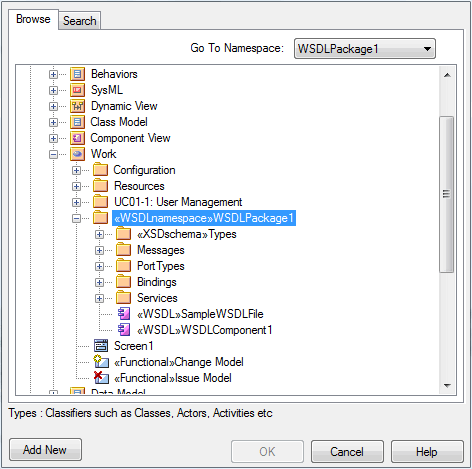
- If required, in the Go To Namespace field select a namespace to reduce the scope of the displayed hierarchy. The dialog opens the section of the hierarchy associated with that namespace, and closes all previously-open sections associated with other namespaces.
- You can either:
- expand the selected area of the hierarchy on the Browse tab, or any other package, and locate the required item (go to step 5) or
- click on the Search tab and, in the Find field, type a partial or complete text string to search for the item.
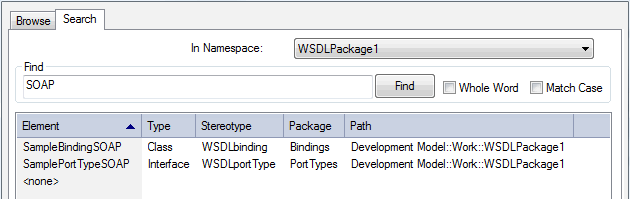
- On the Search tab, you can filter the search further by selecting the Whole Word and Match Case checkboxes.
Each list entry shows the name of the item, the type, any stereotype the item has, the immediate package in which the item is held, and any successive parent packages (the package path). You can either:
- Select the item immediately on the Search tab or
- Right-click on one item or a group of items and select the Locate item(s) in tree context menu option; this redisplays the Browse tab and highlights each selected item in the <namespace> hierarchy.
- Click on the required item.
- Click on the OK button.
Note: |
When you have selected an item, the Select <Item> dialog retains the context and item. Next time you display the dialog, if the context is similar the dialog opens to the same Namespace and item. For example, if you have selected an activity for a State transition and you start to do the same for another transition, the dialog opens to the activity you previously selected. If the context is totally dissimilar, the dialog opens with the Namespace <any> and a collapsed model hierarchy. |
If the available items do not meet your requirements, you can create a new item and define the appropriate properties. Click on the Add New button. The appropriate Add <Item> dialog displays, on which you define the required item.
Note: |
The Add New button is not always available, depending on the context and the type of item being searched for. |
Multiple Selection
Where an operation permits the selection of multiple items, the Select <Item> dialog is automatically enabled to support this. To select the items, press [Ctrl] as you click on each item. Having selected an item, you can continue to expand and browse the hierarchy, and/or search for items; the dialog retains the existing selections until you click on the OK button.