Please note : This help page is not for the latest version of Enterprise Architect. The latest help can be found here.
Model Start Event
A Start Event indicates where a particular Process begins. Every Process in Enterprise Architect must begin with a Start Event.
A Process can start in several ways, depending on the Trigger Type. The OMG BPMN 1.1 Specification defines six types of Trigger:
- None
- Message
- Timer
- Conditional
- Signal
- Multiple
In Enterprise Architect, four of these Trigger types can be mapped to BPEL as per the OMG BPMN 1.1 Specification:
- Message
- Timer
- Conditional
- Multiple
To create a new Start Event in your model, follow the steps below:
- Open a BPEL diagram created under a BPEL Process.
- Drag the Start Event element from the BPMN 1.1 Core page of the Toolbox onto the diagram. A prompt displays to select either an edge-mounted event (on an element border) or a standalone event.
- Click on either option. The BPEL Properties dialog displays.

- In the Name field, type a name for the Event.
- Click on the drop-down arrow in the Trigger Type field and select the required type.
Depending on the trigger type you select, further details might be required.
If you select Timer:
- The Details tab changes as below:

- In the Time Cycle field, type the value of the time cycle.
- The Time Date field defaults to today's date. If it is necessary to change the date, click on the checkbox and the drop-down arrow and select a new date from the calendar.
Note: |
The Time Cycle and Time Date fields are mutually exclusive, so you can only set one of them. |
- Go to step 10.
If you select Message:
- The Details tab changes, as below.

- To the right of the Web Service field, click on the [ ... ] button and select a BPEL web service from the list.
- To the right of the Message field, click on the [ ... ] button and select a message from the list of all messages in the selected web service.
- Go to step 10.
If you select Conditional:
- The Details tab changes, as below.

- To the right of the Condition field, click on the [ ... ] button and select a Condition element from the list of Condition elements created in the Supporting Elements package.
- Go to step 10.
If you select Multiple:
- The Details tab changes, as below.
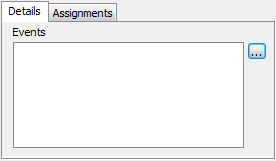
- To the right of the Events field, click on the [ ... ] button and select further Start Events from the list of events in this process that might trigger the process.
- Go to step 10.
Resume the procedure:

- (Optional) To the right of the field, click on the [ ... ] button and select one or more Assignment elements from the list of Assignments created in the Supporting Elements package.
Note: |
Click on the UML button if you need to define further properties of the Start Event, using the normal element Properties dialog. Alternatively, right-click on the element and select the Properties context menu option. |
- Click on the OK button to close the dialog.
To return to the BPEL Properties dialog for subsequent editing:
- Double-click on the element in the diagram or Project Browser (the Shows Properties option must be selected in the Double click on browser panel of the Options dialog) or
- Right-click on the element in the diagram or Project Browser and select the BPEL | BPEL Properties context menu option.