Please note : This help page is not for the latest version of Enterprise Architect. The latest help can be found here.
Action Notation
Description:
When you drag the Action icon from the Activity page of the Toolbox onto your diagram, a selection list displays showing the commonest types of Action to create. (If this list does not display, press ( Ctrl ) as you drag the icon.)
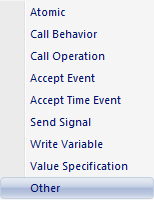
When you click on one of the specific types, that type of Action element displays on diagram. If you click on the Other option, the New Action dialog displays. You can again select to create a normal (Atomic) Action element, a CallOperation or a CallBehavior, or you can select the Other radio button and click on the drop-down arrow in the blank field to select the Action type from an extensive list.
If you later decide that the Action type is not appropriate, you can change it by right-clicking on the Action and selecting the Properties context menu option, and then selecting the Advanced page of the Properties dialog. Set the Action type by selecting a value from the Kind drop-down list. For a Value Specification Action, you also set the value on this page.
Action Kind Notation
Action Kind |
Notation |
See Also |
|---|---|---|
AcceptEvent |
|
|
AcceptEventTimer |
|
|
CallBehavior |
|
|
CallOperation |
|
|
SendSignal |
|


For an Accept Event Action element, the Properties dialog contains a Triggers tab on which you define one or more triggers to denote the type of events accepted by the Action, as defined in the following table:
Field |
Usage |
See also |
|---|---|---|
Name |
Specify the name of the trigger |
|
Type |
Specify the type of trigger: Call, Change, Signal or Time
Code generation for State Machines currently supports Change and Time trigger events only, and expects a specification value |
|
Specification |
Specify the event instigating the Transition |
|
SendSignal Action & BroadcastSignal Action:
For a SendSignal or BroadcastSignal Action element, you can model the signal to be sent and the associated arguments to be conveyed, using the Signal tab of the element Properties dialog.
To model the signal to be sent and the associated arguments to be conveyed, follow the steps below:
Step |
Action |
|---|---|
1 |
In the Signal field, click on the ( ... ) button and select the required signal from the Select Signal dialog |
2 |
In the Attribute field, click on the drop-down arrow and select the attribute (as previously created in the Signal element) with which the arguments are to be associated |
3 |
In the Value field, type the appropriate value for the attribute |
4 |
Identify the arguments (as ActionPins) for the Signal; click on the Add button under the Arguments panel, and select the appropriate Pins from the Select Pin dialog To assign more than one Pin, press ( Ctrl ) whilst you select each Pin |
5 |
Click on the Save button |
Structural Feature Actions:
Enterprise Architect supports the following types of Structural Feature Actions:
- AddStructuralFeatureValue
- ClearStructuralFeature
- ReadStructuralFeature
- RemoveStructuralFeatureValue
- WriteStructuralFeature
These actions can take Ports, Parts or Attributes as the target structural feature.
To set the appropriate target structure feature, follow the steps below:
Step |
Action |
|---|---|
1 |
Right-click on the Action element in the diagram, and select the Advanced | Set Structural Feature context menu option The Set Structural Feature dialog displays |
2 |
To locate the structural feature, click on the Add button The Select Property dialog displays (a variant of the Select <Item> dialog) |
3 |
Browse or search for the appropriate structural feature, and double-click on it The feature name and location displays in the structuralFeature field of the Set Structural Feature dialog |
4 |
Click on the OK button to save the setting |