Please note : This help page is not for the latest version of Enterprise Architect. The latest help can be found here.
Document Options
The RTF report options enable you to set type filters and order the elements. You can access the options from two different places; the start point affects the persistence of options selected:
- If you access the options on the Options and Advanced tabs of the Generate RTF Documentation dialog, you can define settings for the current report to be run. Selections are non-persistent, and are reset when you exit the dialog or select a different template.
- If you access the options by clicking on the File | Document Options menu option on the RTF Style Template Editor dialog, the settings are saved with the template as the default settings for any run of this report; the Document Options dialog provides the options from both of the Options and Advanced tabs of the Generate RTF Documentation dialog, plus the Element Filters and Other Filters tabs, with three minor differences.
The Options tab of the Generate RTF Documentation dialog has the following fields:

Option |
Use to |
Filter |
|
Only include objects |
Filter elements according to date created or modified. In the first two fields, select the qualifiers from the drop-down lists. In the third field, select the appropriate date. |
Where Package Phase |
Filter elements according to the value of the Package Phase field. In the first field select the qualifier, and in the second type the required phase (or leave the default value All). |
With element status |
Filter elements according to status. In the first field, select the qualifier (like, not like, in, not in) and in the second field type the value to be used. Values should be enclosed in quotes; for example: "Proposed". If you type more than one value, separate them with a comma; for example: "Proposed", "Implemented". |
Connector Direction |
Filter connectors according to direction. If you select Both, the connector is documented twice; once for the source element and once for the target. For the remaining two values, the connector is documented only for the source or target element, as appropriate. |
Order |
|
Packages by |
Order packages in the generated documentation in either ascending or descending order of Name, Tree Order, Modified Date or Created Date. |
Elements by |
Order elements in the generated documentation in either ascending or descending order of Name, Tree Order, Modified Date or Created Date. |
Diagrams by |
Order diagrams in the generated documentation in either ascending or descending order of Name, Tree Order, Modified Date or Created Date. |
Exclude details for |
Exclude all elements of the selected type or types from the generated document. |
Exclude connector type |
Exclude all connectors of the selected type or types from the generated document. |
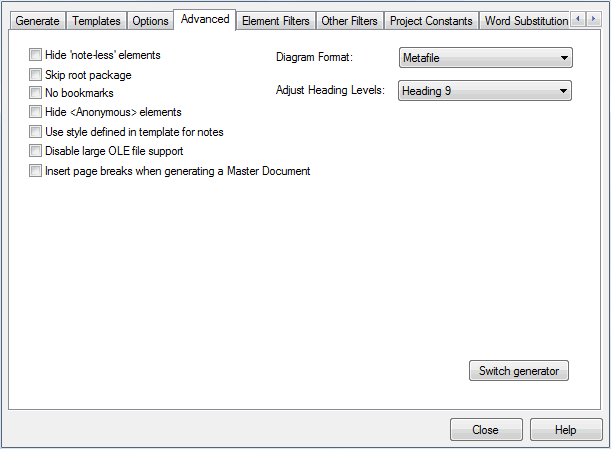
The Advanced tab of the Generate RTF Documentation dialog has the following fields:
Option |
Use to |
||
Hide 'note-less' elements |
Exclude all elements without notes from the documentation. |
||
Diagram Format |
Set the diagram format for the images included within the documentation to either Metafile or Bitmap. |
||
Skip root package |
Exclude the parent package from the documentation and include only the child packages. |
||
No bookmarks |
Stop RTF bookmarks being inserted into the generated document. |
||
Adjust Heading Levels |
Enable the RTF Generator to automatically restrict the levels of heading generated for nested sub-packages in a document. The generator reproduces heading levels down to the value you set. For example, if you have four nested levels of sub-packages and you set this field to:
The field defaults to Heading 9 to accommodate the maximum number of levels of nested subpackages. |
||
Hide <Anonymous> elements |
Hide anonymous elements in the documentation. |
||
Use style defined in template for notes |
Override the character formatting specified in your Notes fields with the formatting set for the field in the template. |
||
Disable large OLE file support |
Disable support for large Object Linking and Embedding (OLE) files. |
||
Insert page breaks when generating a Master Document |
Insert a page break after each Model Document in a Master Document. |
||
Switch generator |
Switch from this Generate RTF Documentation dialog (the Enhanced Template Driven Generator) to the Rich Text Format Report dialog (Legacy Generator).
|
The Document Options dialog provides both sets of options, except for:
- The Switch generator button
- The Disable large OLE file support option
- The Insert page breaks when generating a Master Document option.
The dialog also contains the Optimize for Open Office option, as described for the Generate RTF Documentation dialog, and tabs for setting Element Filters and Other Filters.
Click on the OK button to save your changes.