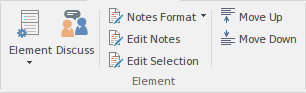
Using the Element Panel
The 'Element' panel brings together a range of facilities for working with the elements that are displayed in the Specification Manager view. There are facilities for adding new elements, and for viewing and editing the Properties of elements, as well as creating, viewing and managing other items associated with the elements, such as Tests, Maintenance items (Defects, Issues, Changes, Tasks and so on), Resource Allocations and Element Discussions.
Available Facilities
|
|
|
|
|
Click on the drop-down arrow to display a range of commands, by which you can edit and manage various aspects of the currently selected element, including properties, Tagged Values, tests, maintenance and work items.
- Properties - access the 'Properties' dialog for the currently selected element
- Add New Element - add a new element to the current Specification Manager list; if a default element type has been specified, an element of that type is created, otherwise the 'New Element' dialog is displayed, prompting you to choose a type
- Add Child - add a new element as a child of the currently selected element; if a default element type has been specified, an element of that type is created, otherwise the 'New Element' dialog is displayed, prompting you to choose a type
- Repeat Previous - repeats the previous element insertion action, creating a new element of the same type, as a sibling to the previously inserted element
- Find in Project Browser - locate the currently selected element in the Project Browser
- Properties Window - open the common Properties window to quickly access major properties for any selected element
- Tagged Values - open the Tagged Values docked window, to edit and manage the Tagged Values associated with any selected element
- Find Elements with Linked Documents - open the Find in Project window and run a pre-defined search, to retrieve all elements in the model that have a Linked Document attached
- Resource Allocation - open the Resource Allocation window to assign resources and schedule tasks for the currently selected element
- Maintenance - display a short menu of options that facilitate opening the various Maintenance windows for the currently selected element
The Maintenance windows allow you to create and review maintenance items such as Defects, Issues and Tasks, related to the selected model element; each of the various Maintenance windows shows a particular kind of Maintenance item
- Defects - show Defects window; create and review Defect items
- Changes - show Changes window; create and review Change items
- Issues - show Issues window; create and review Issue items
- Tasks - show Tasks window; create and review Task items
- Events - show Events window; create and review Event items
- Decisions - show Decisions window; create and review Decision items
- Testing - display a short menu of options that open the Testing window for the current element; the different menu options filter the Test Classes that are displayed in the window
The Testing window is used to create a set of Test Cases for the currently selected element and to record the results of running those tests; the Testing window also supports copying tests of one Class, to create tests of another Class, such as creating System tests, from existing Unit tests
- All - open the Testing window, and display All classes of tests
- Inspection - open the Testing window and display only 'Inspection' tests
- Unit - open the Testing window and display only 'Unit' tests
- Integration - open the Testing window and display only 'Integration' tests
- System - open the Testing window and display only 'System' tests
- Acceptance - open the Testing window and display only 'Acceptance' tests
- Scenario - open the Testing window and display only 'Scenario' tests
|
Linked Documents
Working On Test Records
Project Management Windows
Working on Maintenance Items
Properties Dialog
|
|
|
Open the 'Discussions' docked window. Element Discussions allow modelers to have conversations about elements without 'polluting' the element's notes with questions and modeling level comments such as 'Properties need to be added before the first release'. This feature brings the collaborative modeling platform alive where modelers can add informal discussions about elements, emulating a 'workshop' environment.
|
Element Discussions
|
|
|
Click on the drop-down arrow, to a display a brief menu of commands for customizing the visibility and style of displayed element notes:
- Preview - show the Notes in Preview mode; this limits the Notes displayed to a maximum size and uses the Notes window for editing
- Full Notes Inlined - show the complete Notes text for each element underneath the element name; in this mode you can create, edit and delete Notes text in the Specification Manager and perform the same operations as are available in the Notes window context menu
- Full Notes in Column - show the complete Notes text for each element in a new column next to the element names; you have the same freedom to edit the text as for 'Full Notes Inline'
- Document View - columns are hidden and Notes are displayed inline; use the Enter key as a keyboard shortcut to begin editing.
- Hide - show no Notes at all; to edit or view the Notes, open the Properties window or docked Notes window
|
Appearance Options
|
|
|
Click on this button to begin editing the element's Notes. If the Notes are hidden, or displayed in Preview mode, the Notes window will be used for editing, otherwise the Notes field or column within the Specification Manager will be used. With the element selected, the Space bar can be used as a keyboard shortcut to begin editing.
|
Editing Elements
|
|
|
Click on this button to begin editing the current element's Name. With the element selected, the Enter key can be used as a keyboard shortcut to begin editing.
|
|
|
|
Click on this button to move the selected element up in the Specification Manager list. The element's position is also reflected in the Project Browser.
|
|
|
|
Click on this button to move the selected element down one place in the Specification Manager list. The element's position is also reflected in the Project Browser.
|
|
