Importing ArcInfo Models from Visio to Enterprise Architect
Importing ArcInfo Models from Visio to Enterprise Architect
Esri's ArcGIS platform supported geodatabase design with Visio 2003, which was useful for creating isolated designs. There are now some limitations however, such as currency of supported tools and the difficulty in tracing isolated Visio drawings upstream and downstream. Have you thought about moving your existing Visio drawings to an enterprise model? Consider some advantages:
Your designs become more scalable and maintainable
You use a more complete, up-to-date UML profile for ArcGIS
Exported schemas support the latest versions of ArcCatalog
Trace your geodatabase design directly to other business/IT models
Reporting for a wide range of stakeholders is supported
If you already have this (or a later) version of Enterprise Architect, you may skip this step and proceed to step 2. You can determine which edition and version you are using via Enterprise Architect's Help menu. From the main menu select: Help > About EA...
If you are using an earlier version of Enterprise Architect:
Download the latest trial or registered version of Enterprise Architect:
Run the setup file, which will prompt you to uninstall the prior version of Enterprise Architect.
To complete the model migration, you need Enterprise Architect Corporate edition or higher.
2. Install the MDG Link for Visio add-in for Enterprise Architect
MDG Link for Visio is a free plug-in for Enterprise Architect that allows you to import Visio files into an Enterprise Architect model. If you have already installed MDG Link for Visio version 1.8 or later, you may skip this step and proceed to step 3.
For example, on a 64-bit windows machine, the default path is: C:\Program Files (x86)\Sparx Systems\EA\Scripts\VBScript\
4. Import a Visio file into Enterprise Architect using MDG Link for Visio
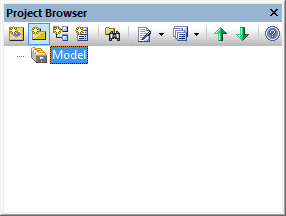
Create a new, empty Enterprise Architect project. From the main menu, choose: File > New Project. Name the project file and click OK.
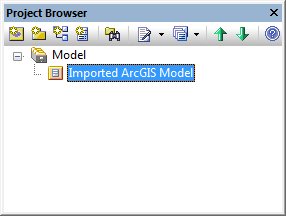
When prompted for a Model Pattern, click the Cancel button to exit the Model Wizard. Use the Project Browser to create an empty package instead. You can type any name for this package, which is simply a container for your imported Visio model.
Select the package you have just created in the Project Browser.
Invoke the Visio Importer by choosing from the main menu: Extensions > Microsoft Visio > Import Visio Documents
You will be prompted for a file location. Browse to the Visio file that you wish to import.
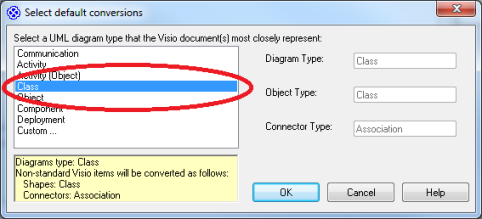
When prompted for the default conversions, select the Class diagram type and Click OK:
During the import process, you may be prompted to enable Macros and ActiveX. This option must be enabled for the import to succeed. When prompted, choose the option to enable macros. Note: Because this dialog can appear behind another window, you may need to use Alt+Tab to make it visible.
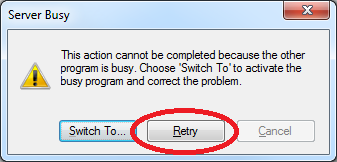
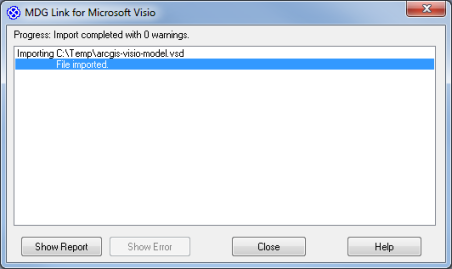
The import process can take several minutes to complete, depending on the size of the model. During the import, you may be prompted to activate the busy program. You can click Retry, to resume the process if it stalls temporarily.
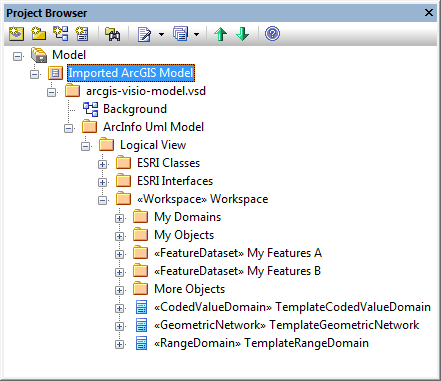
Once the importer completes, you have the option of saving a detailed report of what was imported. Enterprise Architect's Project Browser will be updated to reflect the imported elements.
5. Migrate the imported model using the migration script
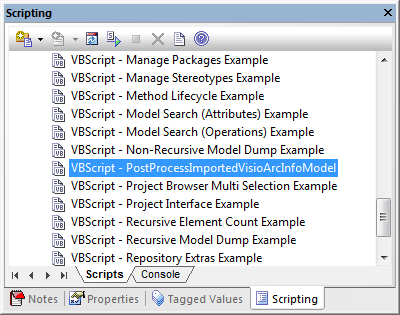
Access Enterprise Architect's scripting window from the main menu: View > Scripting.
Select the "Local Scripts" folder and right-click and run the script: VBScript - PostProcessImportedVisioArcInfoModel.vbs
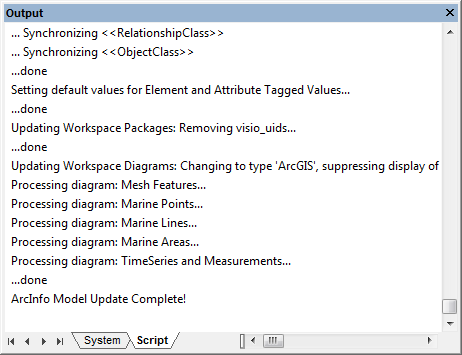
While running, the script will log information to Enterprise Architect's Output window. On completion, right-click the Output window and choose "Copy All To Clipboard"
Paste the log text into a word processor.
Note any warnings or errors. If the script identifies errors, you may need to correct these in the original Visio model, then repeat steps 4 and 5.
6. Verify that your model was successfully imported and migrated
If your model has been migrated successfully, most elements under your ArcGIS workspace will be stereotyped according to Enterprise Architect's UML profile for ArcGIS. These stereotyped elements will also have a property sheet that is dedicated to ArcGIS. Check the following to ensure this is the case:
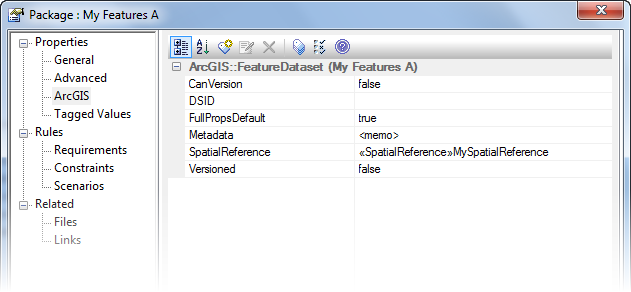
Locate one of the FeatureDataset stereotyped packages in the Project Browser and open its properties (double-click the package in the Project Browser). You should see a property tab labelled "ArcGIS". Clicking this tab should reveal properties similar to those shown below.
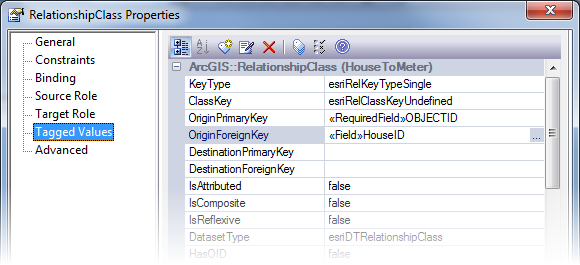
Locate a RelationshipClass connector on one of the imported diagrams. Double-click the connector on the diagram to view its properties. In the Tagged Values tab you should see properties similar to those shown below.
Classes stereotyped as Point, Polyline, Polygon etc. should all have a dedicated properties tab for ArcGIS.
Notes:
While Enterprise Architect attempts to retain Visio's original diagram layout information, such as connector way-points, generally some tidy-up of diagrams will be necessary after migrating your model. You may be able to apply Enterprise Architect's Diagram Layout tool to help automate some of the tidy-up: Main Menu > View > Diagram Layout. The Digraph, Spring and Box layouts have generally been the most helpful for this purpose.
Composite connectors are currently not supported by Enterprise Architect's ArcGIS schema generator.
 Enterprise ArchitectPro Cloud ServerProlaborateTreradoNew