| Prev | Next |
OpenModelica on Linux
If Enterprise Architect is installed on Linux it is necessary to operate with OpenModelica installed on the same platform. The OpenModelica Linux installation is publicly documented for Debian and Ubuntu; however, it can also be installed under Linux Mint.
This Help topic provides guidance on:
- Installation of OpenModelica on:
- Linux Debian / Ubuntu
- Linux Mint - Configuring Enterprise Architect to access OpenModelica.
Linux Debian / Ubuntu
To install OpenModelica on a Linux Debian / Ubuntu system refer to the URL:
https://openmodelica.org/download/download-linux
This provides the instructions for Debian / Ubuntu Packages.
Run these scripts on a terminal.
Step |
Action |
|---|---|
|
1 |
To add OpenModelica to your additional repository list: for deb in deb deb-src; do echo "$deb http://build.openmodelica.org/apt `lsb_release -cs` nightly"; done | sudo tee /etc/apt/sources.list.d/openmodelica.list |
|
2 |
Import the GPG key used to sign the releases: wget -q http://build.openmodelica.org/apt/openmodelica.asc -O- | sudo apt-key add - |
|
3 |
Update and install OpenModelica: sudo apt-get update sudo apt-get install openmodelica sudo apt-get install omlib-.* # Installs optional Modelica libraries (most have not been tested with OpenModelica) |
|
4 |
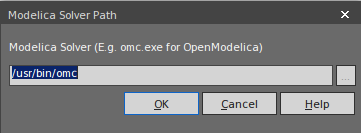
To check this installation, ensure that you can find the file /usr/bin/omc by, for example, executing this command on the terminal:
Your installation is successful if the command returns a string resembling this:
|
Linux Mint
To install OpenModelica on Linux Mint, you initially perform an install for Ubuntu and then modify the Linux Mint code name to match the Ubuntu code name.
This is a list of mappings of the Linux Mint code name to the Ubuntu code name (to be used in later steps):
- Linux Mint 17.3 (Rosa) = Ubuntu 14.04 (Trusty): rosa = trusty
- Linux Mint 18 (Sarah) = Ubuntu 16.04 (Xenial): sarah = xenial
- Linux Mint 18.1 (Serena) = Ubuntu 16.04 (Xenial): serena = xenial
- Linux Mint 18.2 (Sonya) = Ubuntu 16.04 (Xenial): sonya = xenial
- Linux Mint 18.3 (Sylvia) = Ubuntu 16.04 (Xenial): sylvia = xenial
- Linux Mint 19 (Tara) = Ubuntu 18.04 (Bionic): tara = bionic
Click here for a full list of Linux Mint History and the mappings with Ubuntu.
Step |
Action |
|---|---|
|
1 |
Run this script in a terminal: for deb in deb deb-src; do echo "$deb http://build.openmodelica.org/apt `lsb_release -cs` nightly"; done | sudo tee /etc/apt/sources.list.d/openmodelica.list |
|
2 |
To change the repository URL in Linux Mint:
|
|
3 |
|
|
4 |
To update and install OpenModelica, run these scripts in a terminal: sudo apt-get update sudo apt-get install openmodelica sudo apt-get install omlib-.* # Installs optional Modelica libraries (most have not been tested with OpenModelica) |
Access
Use either of these access paths to display the 'Simulation Solver Path' dialog, to configure the solver.
Method |
Select |
|---|---|
|
Ribbon |
Simulate > System Behavior > Modelica/Simulink > SysMLSim Configuration Manager > |
|
Other |
Double-click on an Artifact with the SysMLSimConfiguration stereotype > |
 > Configure Simulation Solver
Configure the Solver
The 'Simulation Solver Path' dialog resembles this:
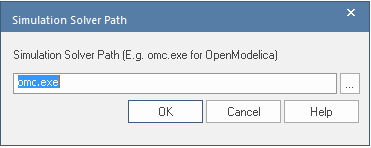
Type in or browse for the path to the solver to use.