| Prev | Next |
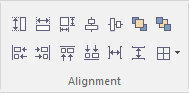
Alignment Panel
The 'Alignment' panel provides a series of tools that can be used to refine the positions of the diagram's elements relative to each other. Groups of elements can be selected and their edges or centers aligned vertically or horizontally. An element's position in the visual stack can be altered by moving them forward or backwards, and you can display a convenient grid that can be configured so that elements and connectors 'snap' into position on the grid.
Available Facilities
Most of the options on this panel become available when you select two or more elements together (press or as you click on the elements). Usually, the last-selected element is the reference element against which the others align; this element is indicated by a hatched border.
Facility |
Description |
See also |
|---|---|---|
|
Make Same Height |
Click on this icon to make all selected elements the same height as the reference element. |
|
|
Make Same Width |
Click on this icon to make all selected elements the same width as the reference element. |
|
|
Make Same Size |
Click on this icon to make all selected elements the same height and width as the reference element. |
|
|
Align Vertically |
Click on this icon to align the centers of all selected elements vertically with the center of the reference element. |
|
|
Align Horizontally |
Click on this icon to align the centers of all selected elements horizontally with the center of the reference element. |
|
|
Bring to Top |
Move the selected elements to the top of the diagram relative to other elements (the top of the Z-Order). |
Z Order Elements |
|
Send to Back |
Move the selected elements to the back of the diagram relative to other elements (the bottom of the Z-Order). |
|
|
Align Left |
Click on this icon to align the left edges of all selected elements vertically with the left edge of the reference element. Shortcut: |
|
|
Align Right |
Click on this icon to align the right edges of all selected elements vertically with the right edge of the reference element. Shortcut: |
|
|
Align Tops |
Click on this icon to align the top edges of all selected elements horizontally with the top edge of the reference element. Shortcut: |
|
|
Align Bottoms |
Click on this icon to align the bottom edges of all selected elements horizontally with the bottom edge of the reference element. Shortcut: |
|
|
Space Horizontally |
Click on this icon to evenly separate the selected elements by the same amount horizontally. |
|
|
Space Vertically |
Click on this icon to evenly separate the selected elements by the same amount vertically. |
|
|
Snap to Grid |
Click on this icon to display a short menu of options for applying a grid to help you position elements on each diagram you review. If all of the options are deselected, you can move and resize elements freely.
|