Book a Demo

Please note : This help page is not for the latest version of Enterprise Architect. The latest help can be found here.

Prev Next

Edit Panel

The 'Edit' panel provides a wide range of facilities for manipulating and checking the text within a document, and searching the content for specific text strings.

Available Facilities
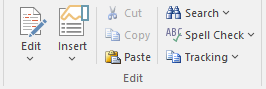
Edit

Click on this icon to display and select from a list of editing operations you can perform within your document. This list includes facilities for tracking changes, setting the direction of text flow, and setting up list overrides.

  • Cut - remove a highlighted text string and hold it in the clipboard
  • Copy - copy a highlighted text string and hold it in the clipboard
  • Paste - paste a text string from the clipboard into the document at the cursor position
  • Paste Special - paste a specially-formatted object from the clipboard into the document, such as formatted text or an OLE object
  • Edit Picture - open the appropriate graphics editor for the selected image, to edit the image
  • Undo - roll back the last unsaved change made; you can undo a succession of unsaved changes
  • Redo - re-establish the last unsaved change that has been undone; you can redo a succession of undone changes
  • Select All - highlight the text of the whole document for performing an operation on it
  • Repaginate - repaginate the document, and update the 'Page Number' and 'Page Count' fields and the Table of Contents
  • Edit Section - display the 'Section Parameters' dialog, on which you set up the document properties to apply to the text between two section breaks
  • Edit Style - display the 'Edit Stylesheet' dialog, through which you create and edit styles to apply to either paragraphs of text or characters
  • Edit Input Field - display the 'Input Field Parameters' dialog, through which you create or edit a field at the cursor position in the document, for the document users to enter data in
  • Edit Frame/Drawing Object - display a short list of options for editing or re-positioning a frame or drawing object, including setting the direction of text flow within the object
  • List and Overrides - display a list of options for setting up paragraph numbering list items, overrides and levels
  • Page Header/Footer - display a hierarchy of menus for creating, editing and deleting the page headers and footers of the document
  • Edit Footnote/Endnote - select to add or edit either an end-note or the footnotes of the current page
  • Edit OLE Object - open the appropriate editor to edit the embedded OLE object
  • Inline IME - set the document to accept both single-byte characters and double-byte characters, without having to switch to an external Input Method Editor (IME) application (double-byte characters are complex characters used in languages such as Japanese and Cyrillic)
  • Document Text Flow - display the 'Document Text Flow' dialog, on which you set the text flow for the whole document to left-to-right, right-to-left, or the default for the system

Insert

Click on this icon to display and select from a list of text breaks, objects, special text structures and special characters to insert in the document at the cursor position.

  • Insert Break - display a short menu from which you select to insert a page break, section break or column break
  • Embed Picture - insert an image file as a picture in the document
  • Link Picture - insert a link to an image file in the document
  • OLE Object - display the 'Insert Object' dialog, from which you can select the appropriate application to create the OLE object in the document
  • Insert RTF File - insert the complete contents of another document file
  • Frame - inserts a small frame at the cursor position, which you can then drag to the appropriate size
  • Drawing Object - display the 'Select Drawing Object' dialog and select to insert a text box, rectangle or line, which you can then drag to the appropriate size
  • Page Number - insert a page number field at the cursor position
  • Page Count - insert a page count field at the cursor position
  • Date and Time - display the 'Insert Current Date and Time' dialog, which you use to create data and/or time fields in the page layout, in one of a selection of formats
  • Footnote/Endnote - select to insert a footnote or an endnote linked to a marker in the text; a dialog displays in which you enter the marker character and the note text
  • Bookmark - display the 'Bookmark' dialog, which you can use to create, locate and delete bookmarks in your document
  • Table of Contents - display a short dialog in which you define the highest and lowest heading levels to reflect in the Table of Contents (you must define the appropriate Table of Contents level styles before doing this); when you click on the OK button, the Table of Contents generates
  • Data Field - display the 'Data Field Parameters' dialog, in which you enter the field name and the data value of your own data field to insert in the document
  • Text Input Field - display the 'Input Field Parameters' dialog, in which you enter the field name and characteristics of a field in which the document users can enter their own information
  • Checkbox Field -display the 'Checkbox Field Parameters' dialog, in which you define a checkbox that the document users can select or clear
  • Selection Field - display the 'Selection Field Parameters' dialog in which you define a drop-down list field for which the document users can select one of a set of values to display
  • Hyperlink - display the 'Insert Hyperlink' dialog, on which you enter the hyperlink text and the identifier for the object being linked to, either within the model or external to it
  • Non-breaking Space - insert a non-breaking space at the cursor position, so that if the document text flows to a new page at that point, the words linked by the space are kept together
  • Non-breaking Dash - insert a non-breaking dash at the cursor position, so that if the document text flows to a new page at that point, the words linked by the dash are kept together
  • Optional Hyphen - insert a hyphen at the cursor position

Cut

Click on this option to remove a highlighted text string and hold it in the clipboard.

Copy

Click on this option to copy a highlighted text string and hold it in the clipboard.

Paste

Click on this option to paste a text string from the clipboard into the document at the cursor position.

Search

Click on this icon to display a short menu of options for locating a text string in the document.

  • Search - open the 'Search Text' dialog, to specify the text string to locate and the initial search parameters
  • Search Forward - continue the search forwards towards the end of the document, to the next occurrence of the defined text string
  • Search Backward - continue the search back towards the start of the document, to the next occurrence of the defined text string
  • Replace - open the 'Replace Text' dialog to search for a text string and replace it with another, in selected text or throughout the document
  • Go to Line - display a short dialog in which you specify the number of a line in the document to 'jump' the cursor to

Spell Check

Click on this icon to display a set of simple options for checking the spelling in the document.

  • Spell Check - start a spell check on the document, and respond to all apparent spelling errors
  • Auto Spell Checking - set the system to automatically check all existing text and new text as it is typed or imported into the document, underlining apparent errors in red
  • Thesaurus - display the 'Thesaurus' dialog in which you can check for alternative or opposite terms for the selected text string
  • Spelling Options - display the 'Spelling Options' dialog, on which you identify the text features to include or ignore in the check, the language dictionary to apply, what speed and accuracy of check to accept

Tracking

Click on this icon to display a menu of options for enabling and using Change Tracking in the document. These options include:

  • Enable Tracking - turn Change Tracking on and off
  • Find Next Change - locate and highlight the next tracked change, moving towards the end of the document
  • Find Previous Change - locate and highlight the previous tracked change, moving towards the start of the document
  • Accept Change - update the document with the currently-selected change
  • Accept All Changes - update the document with all changes
  • Reject Change - remove the change from the document
  • Reject All Changes - remove all changes from the document
  • Hide Changes - hides or reveals deleted text and the highlighting on added text in the document
  • Apply Comment - helps you create a comment on the selected text, which displays in the outside page margin

Learn more