| Prev | Next |
Walkthrough: Jama Integration
Prerequisites
In order to set up integration between Jama and Enterprise Architect, you must first:
- Be using a licensed installation of Pro Cloud Server (Version 5.0 or later) with the Integration Plug-ins component
- Select the 'Enable Pro Features (OSLC, WebEA and Integration)' option in the Pro Cloud Server configuration for each Database Manager System hosting your Enterprise Architect models
- Have network access between the PCS server and the Jama server
- Have user credentials to access the external data
- Be using Enterprise Architect Corporate, Unified or Ultimate edition v16.0 or later
We will assume that the Integration Server and the Jama Integration Plug-in are to run on the same machine as the Pro Cloud Server
Identify Jama to Pro Cloud Server and Enterprise Architect
Work through these steps:
- Double-click on the 'Pro Cloud Config Client' Desktop icon to open the Pro Cloud Config Client window.
- Select the 'Integration' tab and select the 'Enable Integrations' checkbox. In the 'Port' field type the number of the Port the Integration Server will listen on for requests from the Pro Cloud Server.
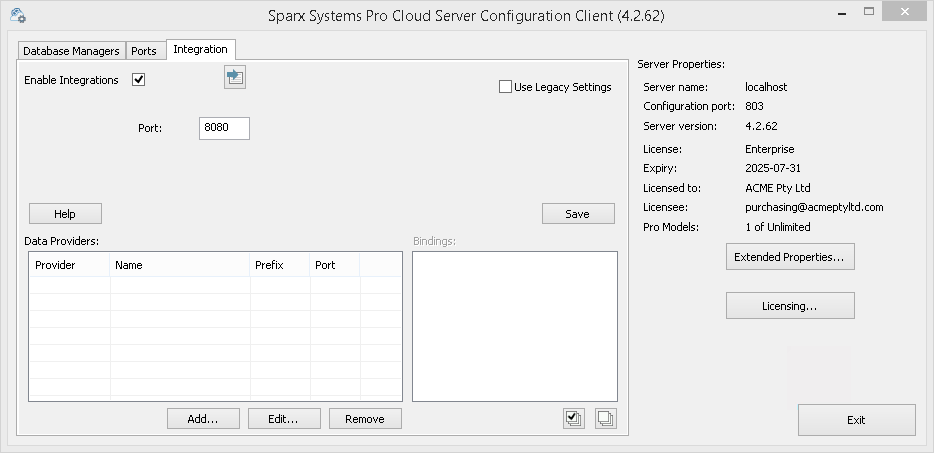
- Click on the . The 'Add Data Provider' dialog displays.
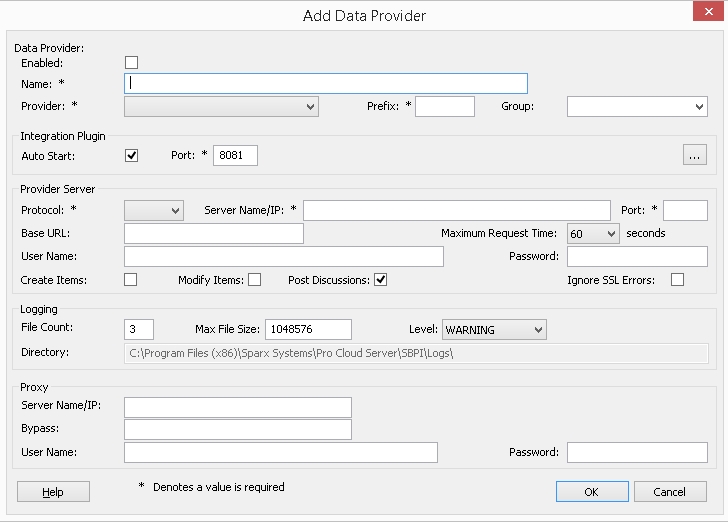
- Select the 'Enabled' checkbox.
- In the 'Name' field, type an appropriate connection name, such as 'Jama'.
- In the 'Provider' field, click on the drop-down arrow and select 'Custom Integration'.
- In the 'Prefix' field, enter an appropriate prefix, such as 'Jama'.
- In the 'Group' field enter a name for the root level when browsing the Jama integration (e.g. 'Jama - Integration').
- In the 'Integration Plugin' panel, in the 'Port' field, type the number of the Port that the Integration Server will use to communicate with the Jama Plug-in.
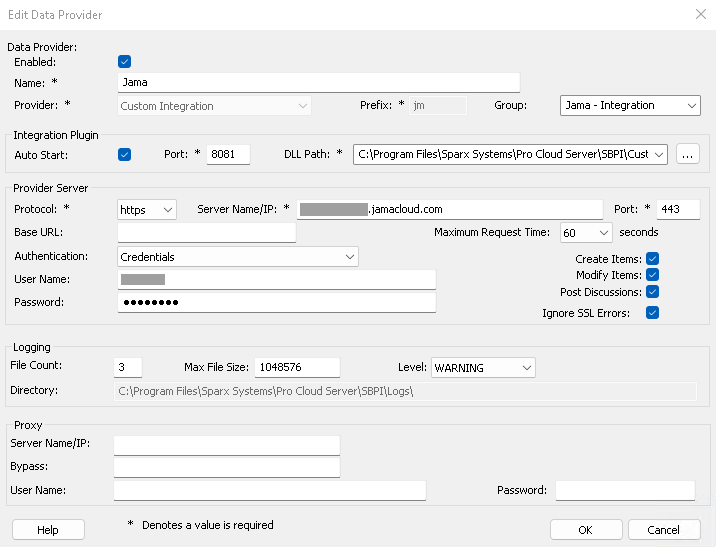
- Click on the ellipsis button next to the 'DLL Path' field. Browse and select the 'JamaIntegrationPlugin.dll' file. This is located within the Pro Cloud Server Installation folder. E.g. C:\Program Files\Sparx Systems\Pro Cloud Server\SBPI\JamaIntegrationPlugin.dll
- The fields in steps 11 to 14 make up the components of your Jama web address; that is: <protocol>://<server>:<port>/baseURL
In the 'Protocol' field, click on the drop-down arrow and select the protocol that the Jama Plug-in will use to communicate with Jama. - In the 'Server Name/IP' field, type the server name or IP address that the Jama Plug-in will use to communicate with Jama.
- In the 'Port' field type the number of the Port that the Jama Plug-in will use to communicate with Jama.
- The 'Base URL' field can be left empty.
- Set values in the 'User Name' and 'Password' fields, the values will be used in combination to access the data within Jama. All current Enterprise Architect users of the Jama installation will use the same set of credentials to read the external data.
- Select the 'Create Items', 'Modify Items' and/or 'Post Discussions' checkboxes as necessary, to allow users of the Jama Plug-in to create and/or update items and/or create Discussion posts in Jama using Enterprise Architect.
- If you want the Jama Plug-in to ignore SSL-related errors that occur as a result of communicating with Jama (e.g. if you are using a self-signed SSL certificate), select the 'Ignore SSL Errors' checkbox.
- If your access to Jama uses a Proxy server enter the relevant details in the Proxy section:
Server Name/IP - The server name (or IP) and Port number of the Proxy Server; for example, proxyserver.com:3131
Bypass - This field provides a mechanism for certain addresses to bypass the proxy; it accepts multiple values separated by semi-colons (;). For example, 192.168.*;*.localdomain.com;www.mydomain.com
User Name - If the Proxy Server requires credentials, this field provides the user name.
Password - If the Proxy Server requires credentials, this field provides the user password.
- You can leave other fields blank or set to their default values. Click on the to complete the configuration. This returns you to the 'Integration' tab of the Pro Cloud Server Configuration Client window.
Identify Enterprise Architect models to Jama
On the 'Integration' tab of the Pro Cloud Server Configuration Client window, you will now see:
- On the lower left of the screen, the 'Data Providers' panel listing the Custom Integration for Jama as a data Provider
- On the lower right of the screen, the 'Jama' is bound to:' panel displaying a check list of the Enterprise Architect models from your Pro-enabled Database Manager(s)
You can either click on the checkbox against each Enterprise Architect model you want to bind to Jama, or click on the ![]() to select all of them at once.
to select all of them at once.
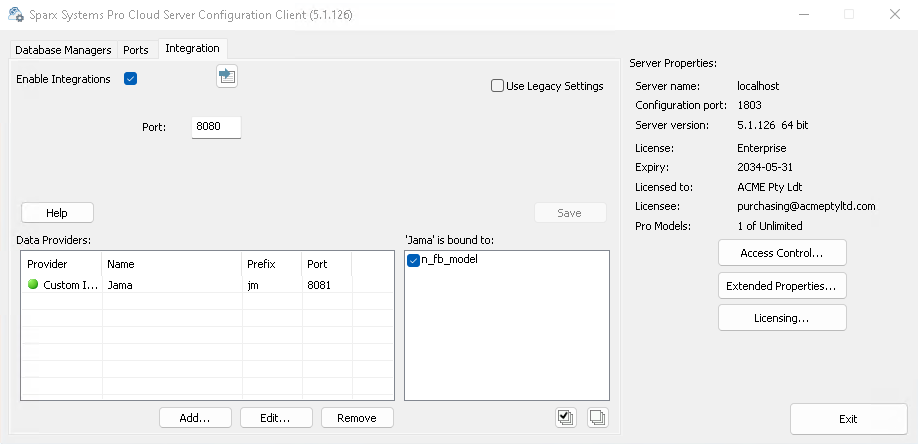
Click on the .
Restart the PCS Service to apply the changes you have made.
You can now go into one of your Enterprise Architect models and check the integration with Jama.
Test the Integration
In Enterprise Architect open one of the models you have identified as being bound to Jama.
- Select the ribbon option Specialize > Tools > System Integration.
- In the toolbar of the External Data window, click on the drop-down arrow to the right of the 'globe' icon.
- Select the integration group (e.g. 'Jama - Integration' or 'Custom Integration') from the list. This is the 'Group' which you had entered in the 'Add Data Provider' dialog.
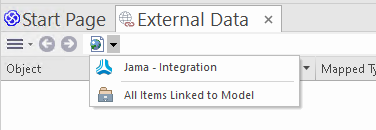
- Click on 'Jama' in the breadcrumb trail, this represents the root of the Jama repository.
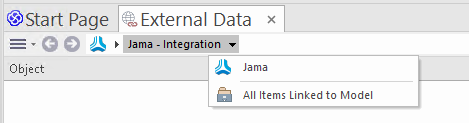
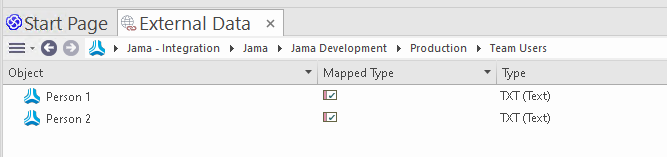
- Continue using the breadcrumb options to drill down into the Jama projects and access Work Items (Requirements, Issues, etc).
Data Mapping
In order for Jama and Enterprise Architect to smoothly exchange data items, you should review and - if necessary - edit:
- What type of Jama item corresponds to which type of Enterprise Architect element, and
- What property of a Jama item corresponds to which property of an Enterprise Architect element.
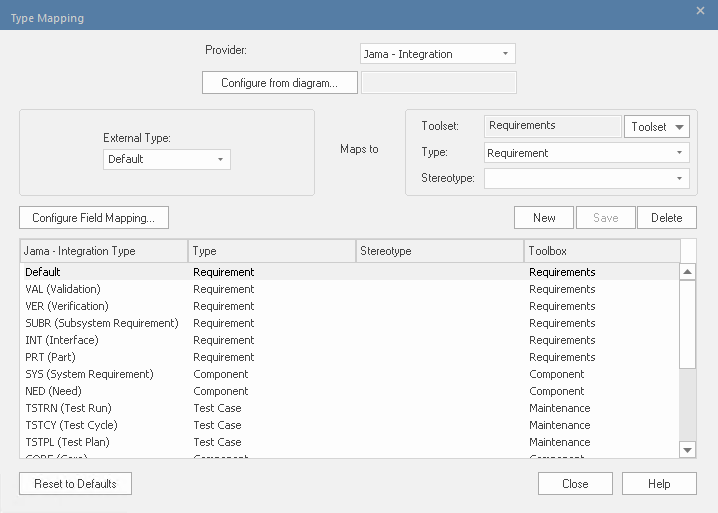
These tasks are fully explained in the Configuration Help topic.
Review Jama Data
When you tested the communication between Enterprise Architect and Jama, on the External Data window, you used the breadcrumb trail to view lists of work items (e.g. Tasks). If this list is too long, you can click on the 'Hamburger' icon in the window toolbar.
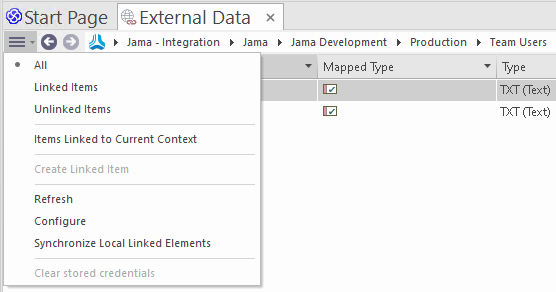
This menu provides options such as:
- 'Linked Items' to show only those Jama items that are linked to Enterprise Architect elements
- 'Unlinked items' to show only those Jama items that have not yet been linked to Enterprise Architect elements, or
- 'Items Linked to Current Context' to show only the Jama items that are linked to the currently selected Enterprise Architect element
It's also possible to apply text based filters to the External Data table contents.
- Right click the column header and select 'Toggle Bar' (if it's not displayed already).
- Type some text into the filter/search field just below the column name,
When selecting an item from the list each of the Properties window, Notes window, Inspector window and 'Discuss' tab of the Discuss & Review window have separate tabs or versions of the window to display any properties, notes, features and discussions (respectively) of the selected item. These are illustrated in the External Item Details Help topic.
Working with Jama items and Enterprise Architect elements
Having created a working communication between Enterprise Architect and Jama, you can:
- Create a new element in Enterprise Architect linked to a Jama item
- Create a new Jama item linked to an element in Enterprise Architect
- Link an existing element in Enterprise Architect to a Jama item
- Update the Jama item with changes to the Enterprise Architect element ('Push' changes)
- Update the Enterprise Architect element with changes to the Jama item ('Pull' changes)
- Update all linked Enterprise Architect elements with any changes to the Jama items (Synchronize All)
These actions are all explained in the Linking Items Help topic.
Learn More
- Configuration (Integration Type Mapping)
- External Item Details
- Linking Items
- Troubleshooting